Salted Buckwheat Oat Cookies

IMG_3807
I have made this cookie so many times lately and altered them in so many ways I realized I have got to write this down to remember all the variations.

The original recipe comes from GFF MAG for their Buckwheat Chocolate Chip Almond Butter Oatmeal Cookies. It popped up on my instagram feed and looked like an interesting “healthy” free of refined sugar, hearty cookie I could take with me to work.

For the last few months I’ve definitely been stress eating, like many. I needed to replace the pies and cookies I’ve been making with something a little healthier which could also potentially satiate me longer than the usual sweet treat. I’m not going to the store nearly as often as usual and I’m not going to pick up food while at work. Each time I make a batch of these I store half in the freezer and take a baggie with me to work since I can’t leave during the day.

They’re not calorie-free but they’re a great not-too-sweet-cookie alternative. Plus, I put basically anything I have into them so if I don’t have an ingredient I still don’t need to go to the store. One batch I was running low on rolled oats so I used half oats and half instant oatmeal, still worked great. It seems to be fool-proof so far.

Ingredients:
1/2 cup sweet white rice flour (such Mochiko)
1/2 cup buckwheat flour
1 cup gluten free old-fashioned oats
1 teaspoon baking soda
1/2 teaspoon fine sea salt
1 cup smooth unsalted almond butter*
3/4 cup plus 2 tablespoons maple syrup
6 tablespoons melted and cooled coconut oil
1 teaspoon vanilla extract

Optional (use as many or as few of the following ingredients as desired):
1/2 cup chopped pecans or walnuts
1/2 cup chopped bittersweet chocolate or mini chocolate chips
1/4 cup cacao nibs
1/4 cup dried cherries or cranberries
1/4 cup salted pepitas/pumpkin seeds

Extra oats for garnish
1/2 Tablespoon flaky salt like Maldon Sea Salt

*I have used almond butter, chocolate hazelnut butter, peanut butter, and a combination. All worked well with very little difference in the taste. If using something sweetened (like honey almond butter), eliminate the additional 2 Tablespoons of maple syrup.

Instructions:
Preheat to 375ºF. Line a baking sheets with parchment paper.

In a bowl, whisk together the sweet rice flour, buckwheat flour, oats, baking soda, and sea salt.

In a large bowl, stir together the almond butter, maple syrup, coconut oil, and vanilla. Add the flour mixture. Stirring until combined and then beat with a wooden spoon for 20 seconds more to create a chewy texture. Stir in any or all of the optional toppings.

Measure out approximately one tablespoon per cookie. Form it into a ball with your fingertips and place on the parchment paper. Space balls about 2 inches apart. Lightly press down with your thumb to flatten just a bit. I found these stayed in the ball shape unless I flattened them out myself.

Add a sprinkle of oats and a couple of flakes of salt onto each cookie.

Bake until they begin to crack a bit on top and are puffed a bit- about 10 minutes. They will stay soft until they begin to cool.

Posted in Dietary Restrictions, Recipes, Sweet, Uncategorized | Tagged , , , , , , , | Leave a comment

Roasted Squash with Maple and Ginger Glaze

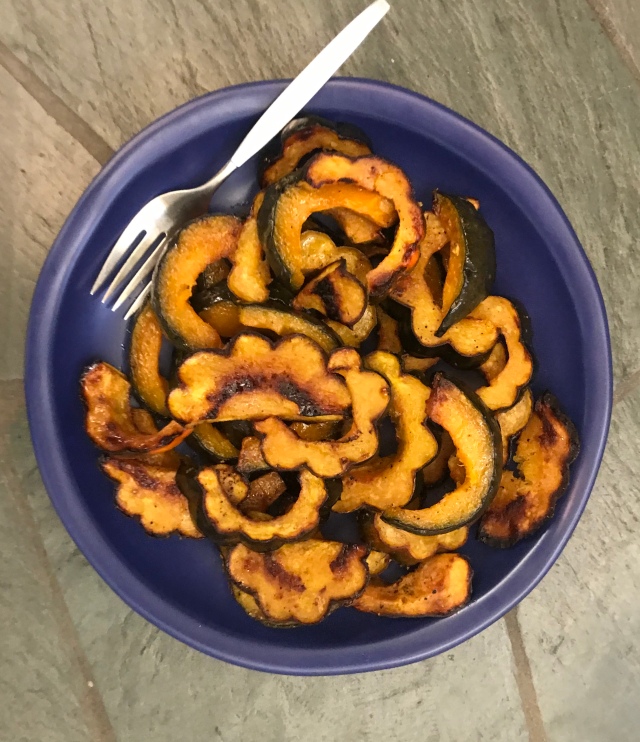
IMG_0909.jpg

Well it’s been two years since last I wrote here. I loved this squash dish so much I needed to write it down. There were so many recipes out there for orange Thanksgiving side dishes but so many involved dairy or sugar or marshmallows. Don’t get me wrong, I love(d) those things but I wanted something light that I could eat all week.

I used a combination of kabocha and acorn squash but you could use delicata or butternut if you prefer. They were both delicious but took very different times to roast so I kept them on separate baking sheets.

Ingredients
2 pounds orange squash, cut into 1/2-3/4 inch slices
olive oil
salt and pepper

Glaze
2 Tablespoons earth balance butter
1 Tablespoon coconut oil (optional, or use olive oil or butter)
1/4 cup + 1 Tablespoon maple syrup
zest and juice of 1 lemon
3 inch piece of ginger, grated

Preheat the oven to 425. Place squash, a hefty sprinkling of salt and pepper, and a couple of tablespoons of olive in a bowl. Toss to coat. Add more olive oil if needed to make sure all sides are lightly covered. Arrange in a single layer on baking sheets (I used 2 large ones). Roast for 20-25 minutes, flipping the squash to its other side and rotating sheet pans about half way through.

While the squash is roasting, melt the butter in a small pot. Add oil, syrup, ginger and lemon zest. Bring to a low boil and let simmer for about 5 minutes. Remove from the heat and stir in the lemon juice.

When the squash is nicely browned and tender, remove from the oven. Turn the oven to broil. Using a pastry brush or a spoon, brush the glaze onto the squash. Be generous! Return the pan to the oven and broil for 3-4 minutes or until the glaze is just a bit caramelized.

Drizzle extra glaze over the squash if desired. Serve warm or room temperature.

Posted in Uncategorized | Leave a comment

Chicken, Spinach and Pumpkin in Coconut Broth

IMG_0288.jpg

I really I don’t know what to call this. I’ve been living in Peru these last months and have had a “kitchen” the last few. I say “kitchen” because I have a stove with 2 burners, a mini fridge, and a shelf. I also have 1 frying pan, 1 small knife, and 1 bowl. Cooking is limited to say the least. Oh I also have 6 spoons. Just in case my friends all come over and we all need a spoon.

I love the food in Peru. The causa, the ceviche, the beautiful fruits. I could write a novel. For now though this feat I’m proud enough that I really wanted to write this down. As much as I love Peruvian food, I love a little variety in my life. Living in a small city it’s basically impossible to find that array of ingredients so I stock up on certain ingredients when in Lima or I ask friends to bring me items. A few weeks ago I requested a small bottle of fish sauce. Then in Lima I got another friend to bring me a can of coconut milk. With a limited supply of these items, I had a decision to make regarding what to do with this liquid gold.

I have easy access to ginger, lemongrass, limes and more limes, vegetables… but of all my favorite recipes I seemed to be missing one thing or another. To make Thai Coconut I’m missing the kaffir lime leaves. To make curries, well… I’m missing the curry! The list goes on. So I decided to wing it and hope for the very best and not waste a drop of my gifts.

Having only one pan to make everything this turned into an amazingly simple dish and took just under one hour. I’m sure you can fancy-it-up and you probably don’t have to dig the dried and non-rotten pieces of lemongrass out of your compost because you forgot to buy more fresh. I also don’t have access to pre-made chicken broth. I have now learned that the butcher will laugh at me but will also kindly remove the chicken feet for me.

Chicken, Spinach, Pumpkin in Coconut Broth
1 large chicken thigh and leg
1 3-4 inch piece of ginger, peeled
3-4 pieces lemongrass, whole
2-3 cloves garlic
1/2 kilo pumpkin, skin removed, cut into 2-inch pieces (or 1/4 kilo pumpkin and 1/4 kilo sweet potato)
1 tomato, quartered
1 bunch of spinach, stems removed
1/2 can coconut milk*
2-3 Tablespoons fish sauce
1-2 Tablespoons sugar
1 Tablespoon mint, chopped
1 Tablespoon basil, chopped
2 Tablespoons cilantro
Juice from 2-3 limes
vermicelli, quinoa, or rice

Place chicken, ginger, lemongrass, garlic and 4 cups of water in a pan and bring to a boil. Cover partially and cook over low heat until chicken is cooked through, about 30 minutes.

Add the pumpkin and cook until just tender. Add the tomato, spinach and coconut milk. Cover so the spinach can wilt and cook completely even though the liquid is not covering it. Cook until spinach is wilted, about 2-4 minutes.

While the spinach is cooking, place vermicelli in a bowl and pour hot water over the noodles. Let sit until noodles soften- about 2 minutes.

Add the fish sauce and sugar to the coconut concoction to taste. Add the herbs and lime juice just before serving.

Strain the vermicelli and place a serving in each bowl. Pour the soup over the noodles and serve.

*This is a brothy dish. You can add the whole can of coconut milk and less water at the start if you have endless access to coconut milk and want it creamier.

Posted in Uncategorized | 1 Comment

Roasted Raddichio, Celery, Walnut and Goat Cheese Salad

I wrote this over 3 years ago and apparently never hit send. This salad was originally inspired by a roasted chicory salad from 24 Diner in Austin, Texas. I would have never ordered such a salad (as I do not love the bitter chicories) but my friend LoTro convinced me and I was quickly hooked. It was my go-to every time. And then I started experimenting and making this at home–frequently. I just saw a picture of her and her baby bump and was reminded of this salad and wondered what ever happened to my post. And there it was sitting sadly in my saved drafts. So here go, as delicious as ever.

Sometimes you have to give certain foods another chance. A fresh start. A new opportunity to take residence in the crisper. I’m looking at you, Radicchio.

Radicchio: a chicory of a red variety with variegated leaves that is used as a salad green. It’s a little too cold to think about cold salads right now, so I’m mixing things up and roasting this hearty red chicory. A little olive oil, a little salt and a bit of acidity go a long way to turn this bitter chicory into a tasty warm salad. You could simply serve this as a side dish or do as I do and take it a little further by making it into a healthy and hearty meal. I even made this at my friend LoTro’s wedding rehearsal dinner once upon a time and I do believe it was a crowd pleaser.

Roasted Radicchio, Celery, Walnut and Goat Cheese Salad
1 medium heads radicchio
4+1 Tablespoons extra virgin olive oil
1-2 teaspoons balsamic vinegar
3 stocks celery
1/4 cup walnuts, toasted and chopped
2 ounces soft/crumbly goat cheese
1 small shallot, finely minced
zest and juice of 1 lemon
salt and pepper to taste

Preheat the oven to 400. Cut the radicchio into quarters and place on a cookie sheet. Sprinkle 4 Tablespoons oil over the radicchio and sprinkle a pinch of salt onto each quarter. Rub oil and salt into all sides. Roast in the oven for 12-15 minutes or until wilted and some parts slightly charred. About 2 minutes before the radicchio appears done, sprinkle the balsamic over the quarters. You can also do this out of the oven later but I like the extra sweetness the vinegar gets as it bakes for a minute or two.

While the radicchio is roasting, prepare the other ingredients: Peel the celery, getting rid of the tough veins. Slice thinly on a diagonal. In a small bowl mix the shallot, zest, lemon, remaining 1 Tablespoon of oil and a pinch of salt and pepper. If you were too timid to add the vinegar during the cooking time, add it to the bowl too. Let the dressing sit.

When the radicchio is ready, place on serving plate and top with the celery, walnuts and goat cheese. Pour the dressing evenly over all. Serve and enjoy.

Posted in Uncategorized | 1 Comment

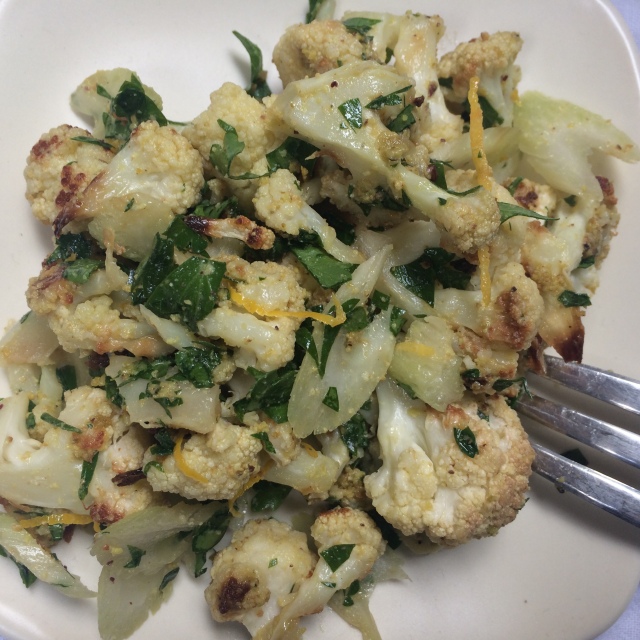
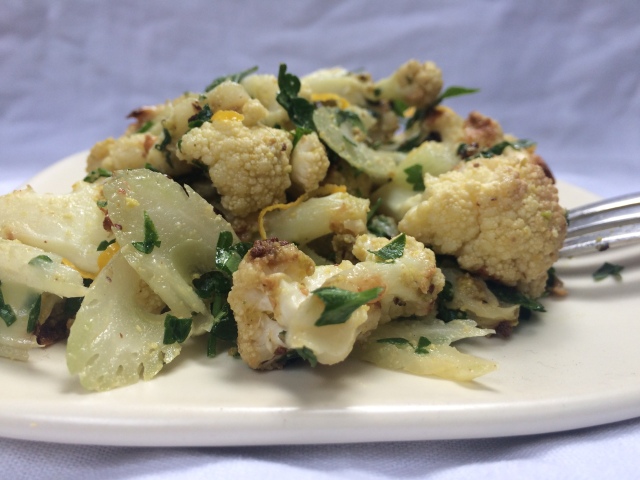
Roast Cauliflower with Pistachios, Meyer Lemon, and Parsley

I’ve come a long way since only eating cauliflower when roasted with lots of orange cheese, butter, and breadcrumbs. Turns out I really like cauliflower in a whole lot of ways.

While roaming the farmers’ market, my sister pointed out our favorite pistachio vendor carrying a bag of ground pistachios and mentioned she likes to toss that with roast cauliflower. Consider me inspired.

img_0054

This is delicious, simple, and naturally gluten free and vegan. I toasted the pistachios just for a brief moment to add some depth to the nuttiness. For this round I added a thinly sliced celery for some extra crunch too. You can easily omit the celery and replace with toasted pistachio pieces if you’re feeling that instead. This is a great side dish with minimal labor involved- serve right out of the oven or at room temperature.

img_0051

Roast Cauliflower with Pistachios, Meyer Lemon, and Parsley
1 head of cauliflower
3 Tablespoons extra virgin olive oil
3-4 Tablespoons ground pistachio, plus chopped pistachio if desired for garnish
zest of 1 meyer lemon
1-2 teaspoons meyer lemon juice
2-3 Tablespoons parsley, chopped
1 celery stock (optional)*
1/4-1/2 t salt
pepper to taste

Preheat the oven to 375. Cut and break the cauliflower into bite-sized chunks and toss on a cookie sheet with 2 Tablespoons of the olive oil and 1/4 teaspoon of the salt. Roast for 18-22 minutes or until the cauliflower is just tender and slightly browned. Check and stir after the first 10 minutes. When cauliflower is 2-3 minutes from finished, sprinkle the ground pistachios onto the pan and over the cauliflower (don’t worry about mixing or where the pistachios land, just evenly spread them over the baking sheet).

When the cauliflower is done (and now the pistachio meal is toasted), immediately place in a bowl and toss with the remaining ingredients (including the extra 1 Tablespoon oil), tasting for salt, pepper, and lemon juice.

*if you opt to use celery, take a tender piece and peel away the tough stems. This makes it a nicer texture and way easier to slice thinly on the diagonal.

Posted in Dietary Restrictions, Recipes, Salty | Tagged , , , , , , | 3 Comments

Cream Cheese Frosting

I have struggled for years to find a cream cheese frosting that I could eat and hold my head up serving to lactose-eaters as well. Carrot cake with cream cheese frosting is my favorite dessert and I’ll often just make the dairy-full version and try not to eat too much. Recently I came across Green Valley Organic‘s Lactose Free Cream Cheese. I buy their yogurt and was super excited (and of course skeptical) when I spotted the cream cheese.

I went home and immediately made carrot cake and whipped up this frosting. I almost cried. My favorite cake recipe finally has a worthy frosting. Note that Green Valley Organics is not vegan! Their products are GMO and antiobotic free and come from real live cows. It is simply lactose free. They are not paying me to advertise:(.

Cream Cheese Frosting
12 oz (1 1/2 cups) Green Valley Organic Cream Cheese, at room temperature
6 oz (3/4 cup) butter (earth balance organic), at room temperature
1 teaspoon vanilla
1/4 cup powdered sugar

Allow the cream cheese and butter come completely room temperature (or I promise you will have lumpy frosting).  Beat the cheese and butter until whipped. Add vanilla and beat. Sift powdered sugar into cream cheese mixture and beat just until whipped. Add more sugar if you like it sweeter. Add a couple of drops of warm water if it’s too thick to spread at room temperature.

Posted in Dietary Restrictions, Recipes, Sweet | Tagged , , | 1 Comment

Pecan, Cherry, Chia Granola

img_0487

img_0481

Breakfast is tough for me. I’m going to guess that’s the case with most people with dietary restrictions. When I find one thing that sounds good- that’s pretty much the only breakfast I’ll want for weeks, months, or longer. Granola is currently my breakfast of choice and the store options are overwhelming and not always my favorite. There’s this one brand my family is obsessed with: delicious but insanely sweet. Starting off the day with a sugary cereal isn’t the best idea for those who want to function the rest of the day, so I’ve opted to make my own. We’ve been having a lot of rainy Sundays here in sunny Southern California and it’s a perfect time to throw a batch of this in the oven and eat it for a week or two, then start again the next week.

As you can see, I am quite particular about my granola: I don’t love raisins or large chunks of nuts, I do love a hearty granola but without tons of oil or sugar or chunks, and I do want to start my day with something that will be tasty and satisfying. This is a basic granola I’ve been making for years- easily adapted according to your own likes and dislikes as well as what you happen to have in the pantry.

Here’s my favorite version with dried cherries and currants as well as pecans, cashews and almonds. Use any combination of the nuts and fruits. There are no large granola chunks in this version.

Pecan, Cherry, Chia Granola
2 1/2 cups gluten-free oats (or regular if you’re not gluten-free)
1/2-3/4 cup pecans, chopped
1/2 cup cashews, chopped
1/2 cup sliced almonds
1/2 cup dried cherries*
1/4 cup currants*
2 Tablespoons Chia Seeds
1 Tablespoon Flax Seeds
1/4 cup + 1-2 Tablespoons maple syrup
2 Tablespoons grapeseed oil (or other mild oil)
1-2 Tablespoons coconut sugar
1 Tablespoon unsulphured molasses (optional)
pinch of salt

Preheat the oven to 250. In a large bowl, combine the oats, your combination of nuts, dried fruit, flax and chia seeds. Mix.

In a small bowl combine the remaining ingredients and whisk until as amalgamated as possible. Pour over the oat mixture and combine completely until all of the ingredients are coated. Spread granola out on a baking sheet, shaking the sheet so the oats spread evenly. Bake for 20 minutes, stir and re-shake, and bake for another 20-25 minutes.

The granola is done when it doesn’t stick at all to the pan and feels somewhat dry- it will continue to dry and bake a bit out of the oven. Cool completely on the baking sheet and then store in an airtight jar on the counter for up to 5 days or in the fridge for up to 2 weeks. Make sure to shake the jar every so often or the seeds will all be left at the bottom.

Serve with your favorite type of milk and berries, drizzle with honey for more sweetness, or have it as a topper to your breakfast yogurt.

*I like the cherries and currants somewhat chewy but not break-the-jaw chewy like some granola. If you want your fruit fresher and not chewy add them after the first 20 minutes of baking.

Posted in Dietary Restrictions, Recipes | Tagged , , , , , , | 2 Comments

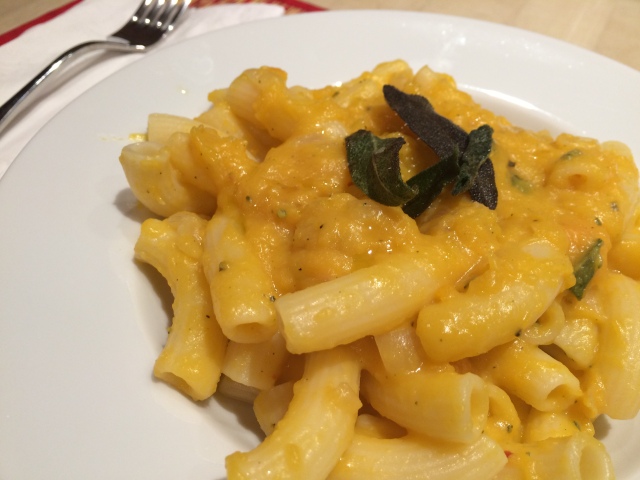
Pasta with Creamy Pumpkin Sauce

img_9984

Halloween is over. Thanksgiving is over. Those pumpkin decorations need to come down and get eaten! Here’s a nice, simple sauce: creamy and rich but still light (and vegan). Roasted squash keeps in the refrigerator for a week or so and in the freezer for a good couple of months. I usually roast, cool, peel, and scoop pumpkin flesh into Tupperware to save for a variety of uses: make sauce right away, freeze some squash for soups, or mash it in place of mashed potatoes.

Make this sauce all through winter, you won’t get sick of it! This recipe is flexible- add a little of this or that and make it your own. The dash of coconut milk makes this extra creamy with just a wee bit of coconuty goodness.

Pasta with Creamy Pumpkin Sauce
4 Tablespoons extra virgin olive oil + more for garnish
10-12 sage leaves
1 small onion, chopped
1 carrot, chopped
3/4 cup almond milk
1/4 +2 Tablespoons coconut milk
2-3 cups roasted pumpkin (kabocha, sugar pumpkin, red kury, pink lady or other meaty pumpkin squash)
salt and pepper to taste
14-16 oz your favorite brand of pasta*

In a wide skillet, heat 1 Tablespoon of the oil and add whole sage leaves. Lightly fry them (about 30 seconds on each side over medium heat)- they should just start to turn color and stiffen up but before they turn black. Remove leaves and set aside.

Using the same skillet, saute the chopped onion and carrot in 2 Tablespoons of the oil until soft and translucent. Add the pumpkin and stir until hot. Whisk in the almond milk and the coconut milk, partially cover and simmer over low heat.

While the sauce is simmering, prepare a large pot of boiling water. Chop the fried sage, reserving a couple of pieces for garnish if desired, and add to the simmering sauce. Taste for salt and pepper.

When your pasta is ready, strain and reserve 1 cup of the pasta water. Depending on the type of squash you used, the sauce may be a bit thick or thin. If it’s thin, remove the cover and continue to simmer for a few more minutes. Otherwise, toss pasta with the sauce and slowly add a bit of the reserved water until you’ve reached the desired consistency. Garnish with the sage leaves, drizzle of olive oil, and a bit of salt.

Posted in Dietary Restrictions, Recipes, Salty | Tagged , , , , , , , | Leave a comment

Apple Almond Cake

img_9092
I love this cake. Love it so much that I’ve made a version of it almost every week for the past month. Plus after having not written here for months and months I wanted to be sure to post something perfectly amazing.

Earlier this week, I got home at 4:30pm and had a total of 40 minutes to whip something up to bring to dinner with my oldest friend at her grandmother’s house. Gaga, as she is called, used to serve us tea sandwiches and strawberry milk; she had a drawer full of cookies we could raid at any time of day; and she dressed elegantly with dainty shoes.

I did not want to arrive empty-handed and it seemed only fitting to bring a delicate cake to go along with whatever delightful treats she pulled out for us (plus I had a total of 40 minutes). The cake was a lovely addition. The kids and grown-ups enjoyed it equally. And Gaga still dresses elegantly and has a drawer full of cookies.

This recipe is adapted from Alice Medrich’s Almond Butter Cake from Flavor Flours. Of course, this recipe is wonderful as is and I’ve created just a few variations to fit various occasions. Here’s the quick and easy apple cake version.

Apple Almond Cake
1 cup white rice flour (160 grams)
1/2 + 2 Tablespoons cup almond flour (70 grams)
scant 1 cup (180 grams) sugar
1 stick (115 grams) earth balance butter, room temperature
1 teaspoon baking powder
1/2 teaspoon baking soda
1/2 cup plain yogurt*
2 large eggs
1 teaspoon vanilla
1/4 teaspoon almond extract
1-2 apples, peeled and cored

Butter a 9-inch round or square cake pan. Preheat the oven to 350. Beat together the flours, sugar, and butter on medium speed. Add the baking powder and soda, yogurt, eggs, and extracts and beat until smooth, at least 1-2 minutes. While the mixer is going, slice the apples into quarters and then evenly and thinly slice each quarter, keeping the quarters together.

Pour the dough into the prepared pan and even out with a spatula. Gently fan out each quarter of sliced apples (in any design) and press lightly into the batter**. The last few versions I have made of this, I used only one apple and spread them out a bit more. Bake for 25-30 minutes. A toothpick will come out with crumbs.

*I use green valley organics lactose free yogurt.
**If you use more apples (like in the photo above), it’ll need more time in the oven. After 25-30 minutes (and the cake is golden), cover with tinfoil and bake an additional 8-10 minutes.

Posted in Uncategorized | Leave a comment

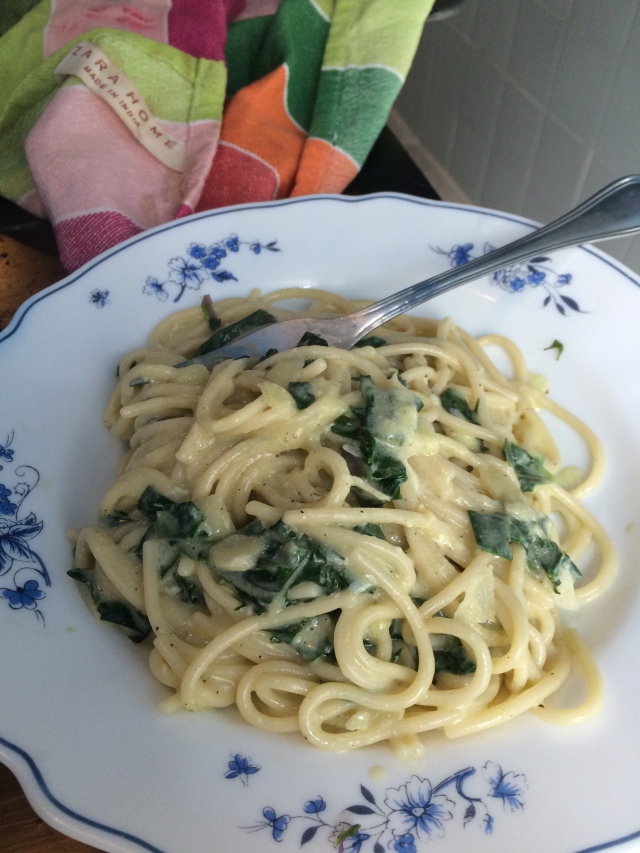
One-Pot Carbonara with Kale

IMG_7089

I was recently given the golden gift of a bunch of kale. Golden because it is unbelievably difficult to find in San Sebastian. I now have two other sources for kale – a fact I was unaware of as I savored each leaf and deliberated over what to make. The conversation in my Spanish class the day I received my gift revolved around what one could do with kale: the look on my Turkish colleague’s face when I showed her this carbonara made my decision easy on what to finally post. Yes, my first cooking post since moving to Spain 5 months ago. Oops.

I am on a budget here and share a kitchen with 5 other individuals. That makes for SOME very simple and inexpensive cooking. One of my go-to favorites here is a basic carbonara. There are a variety of ways to make this pasta but the key is the raw egg mixed into the hot pasta. The farm eggs here are amazing and plentiful. While the ham here is the best, I made this vegetarian version to take advantage of the kale.

I promise this is simple and delicious. Double or triple recipe to make enough for everyone.

One-Pot Carbonara with Kale serves 2
200 grams Spaghetti (half package)
1 egg yolk + 1 whole egg, beaten together in a small bowl
1 small clove garlic, chopped
a few large kale leaves (about 100 grams), tough stems removed, leaves torn into small pieces
3 Tablespoons olive oil
salt and pepper to taste
parmesan to taste
zest of 1 lemon (optional)
chili flakes (optional)

Cook your favorite pasta in plenty of salted water.

While pasta is cooking, prepare your garlic, kale and eggs.

Strain pasta and RESERVE about 1/2 cup of the pasta water. In the same pot, add 2 tablespoons of the olive oil and put over low flame. Add the garlic immediately and stir to keep it from getting brown (the pot is still hot and will cook quicker than you may realize). Add chili flakes if using.

After a minute or so of stirring the garlic, add the kale. Sauté for just a minute until it appears soft. Add the pasta back into the pot and stir to keep from sticking to the bottom. Add the other tablespoon of oil if needed. Add 1-2 tablespoons of the reserved water. Turn the heat off.

While mixing with a fork, add the eggs and stir constantly until you have a rich creamy sauce. Add more of the reserved water if you want it creamier. Add salt and plenty of fresh pepper to taste (and the zest if you are using it). Add parmesan to each individual bowl of pasta.

Posted in Dietary Restrictions, Recipes, Salty, Travel | Tagged , , | Leave a comment